World Wind iOS is an implementation of the World Wind API architecture for iPad and iPhone devices running iOS 7. It consists of the World Wind iOS SDK, simple example program, and a more comprehensive example app. This guide explains how to get started using the SDK.
Scope
The SDK contains the following functionality:
- A World Wind UIView that applications instantiate to show the globe and handle user interaction.
- A 3D terrain model using SRTM, Aster and NED elevation data.
- A set of imagery layers to display on the globe. These include Blue Marble, Landsat, Earth at Night, Bing, Open Street Map and some others.
- Automatic retrieval of terrain and imagery from NASA World Wind servers.
- A collection of shapes: Path, Polygon, Sphere, Point Placemark and Screen Overlay.
- Two types of navigators that implement viewing and navigation: Inspector and First Person.
- Picking of shapes and terrain.
The SDK also includes API documentation, which must be generated via AppleDoc. See the README.txt for instructions on generating the API documentation from the source code.
In addition to a simple HelloWorldWind example app, World Wind iOS contains an example app with the following features:
- A WMS Server browser.
- An interactive layer list.
- Bulk download of imagery and elevations.
- A location tracker.
- A path follower.
- Choice of Inspector or First Person navigation.
- Search-and-go control.
Code Layout
The code is organized into three projects, one for the SDK and one for the example apps. Also included is an Xcode workspace that combines both the SDK and the examples into a single workspace. The intent is that new applications follow this same pattern of creating a workspace for the application and incorporating the World Wind SDK into that workspace.
Obtaining the Code
The source code can be obtained from the World Wind Subversion repository at the following address: http://worldwind31.arc.nasa.gov/svn/trunk/WorldWindIOS/. To obtain the code, change directory to where you want the code placed, then run subversion within a Terminal shell as follows:
svn co http://worldwind31.arc.nasa.gov/svn/trunk/WorldWindIOS/ .
Using the Code
To build the code, open the WorldWindIOS.xcworkspace file with Xcode or AppCode (recommended) and select Build from Xcode’s Product menu. Be sure to build in release mode to ensure best performance. To run the example, select Run from the same menu. If you have not provisioned an iOS device, the app runs in the iOS simulator.
For instructions on running a World Wind iOS app on your device, see the Apple documentation for Launching Your App on Devices.
Using the Example
The comprehensive example automatically creates World Wind layers, terrain and a navigator. It also creates a collection of flight paths over the state of Alaska and a location marker positioned to your current location (if you’ve allowed World Wind to use your current location). There is also a location marker positioned on one of the flight paths in order to illustrate the path-following feature.
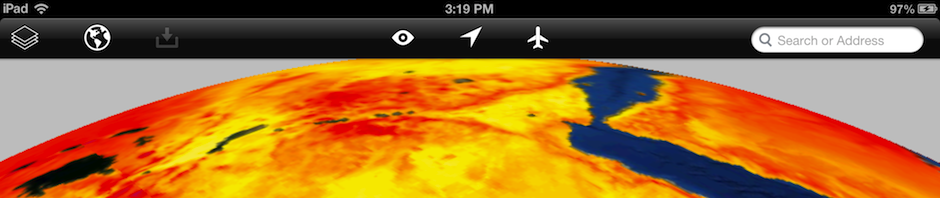
The example’s features are controlled from the toolbar. (See the banner at the top of this page.) From left to right these are:
- Layer List, which identifies the available layers and provides a means to turn them on and off and, for image layers, control their opacity.
- WMS Server Browser, which enables the user to explore WMS servers and view their layers on the globe.
- Bulk Downloader, which allows the user to pre-download imagery and elevations so that they can be seen when the device is subsequently not connected to the internet. To use, select one of the flight paths over Alaska, which causes the bulk download icon to become enabled.
- Navigation Selector, which allows the user to select the navigator type.
- Location Tracker, which when enabled causes the view to track the device’s current location.
- Path Follower, which moves the current navigator to the predetermined flight path, starts the path location moving along the path, and then moves the navigator to follow that location. Try changing the navigator type while path following is on.
- Search-and-go, which enables the user to enter a placename, e.g., Paris, and have the navigator move to that location.
Using the Code in An App
- In Xcode, create a new workspace in the same directory as WorldWindIOS.workspace.
- In that workspace, create a “Single View Application” project. Place it in a sibling directory to the top-level World Wind directory.
- Now add the World Wind project to the workspace as follows: In the Project Navigator, right-click and select Add Files to …, then choose the World Wind project at WorldWind/WorldWind.xcodeproj. Do not select the option to “Copy items into destination group’s folder”.
- In Xcode, select the app target then the General tab. Add the following to Linked Frameworks and Libraries:
libWorldWind.a, which should be one of the choices in the Add list.
SystemConfiguration.framework
CoreLocation.framework
QuartzCore.framework
OpenGLES.framework - In the Search Paths section of the Build Settings tab, add an entry for ../WorldWind to Header Search Paths and make it recursive.
- You will now be able to use the World Wind API from your app. To learn how to do that, see the AppDelegate and ViewController classes of the HellowWorldWind Xcode project, which is part of the WorldWindIOS source.
- World Wind includes ZipKit for reading and writing Zip files. If your app will use ZipKit, add libz.dylib to your app target’s “Link Binary With Libraries” section of Build Phases in Xcode, and add -ObjC to “Other Linker Flags” in your target’s Build Settings in Xcode.
You will now be able to use the World Wind API from your app.
The World Wind team uses AppCode from JetBrains for iOS development. It maximizes our productivity. If you try it you’ll probably be glad you did.
![]()
